-
Free Shipping
Orders $75 & Up
-
30-day Money Back
Guarantee*
-
100% Secure Online Shopping
SSL - Verified Merchant

Razor E300 Battery Kit
Razor E300 Battery Replacement
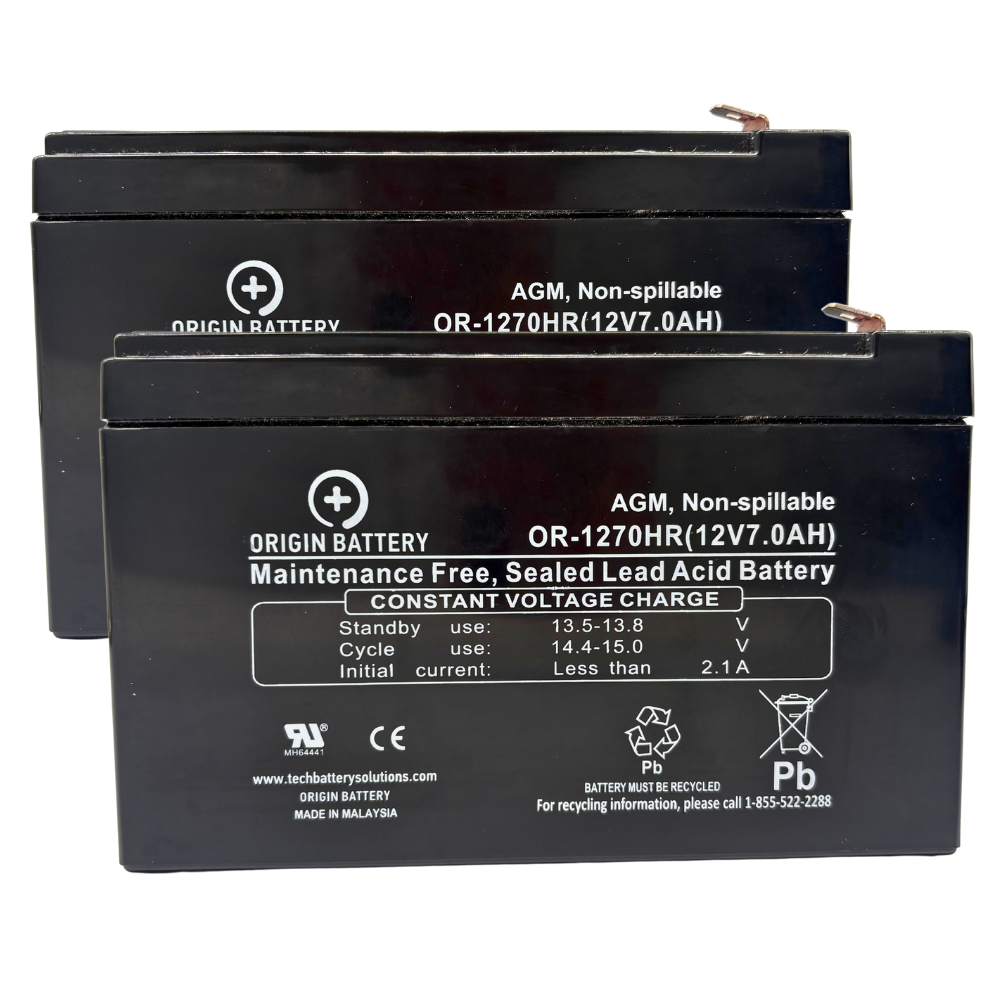
Designed for High-Demand Recreation. Your Razor MX300 delivers throttle-on-demand power requiring batteries capable of sustained high-rate discharge under load. Our dual 12V 7Ah HR AGM system provides consistent 24V delivery precisely when acceleration and hill-climbing demand peak performance.
As battery specialists since 2010, we've analyzed thousands of electric scooter battery installations where reliable recreation means consistent power delivery. Our precision-engineered replacement kit features high-rate discharge AGM technology delivering verified performance metrics - designed for riders who demand dependable, uncompromising operation in recreational powersport applications.
The Razor E300 Battery Kit Includes:
- Two (2) 12v 7ah high-rate discharge sla batteries
- One year free replacement warranty
- Note: You must re-use your existing wiring harness, this kit will be sent out with crimp on style terminal connectors to make this easy.
-
SPECIFICATIONS
-
TECHNICAL DETAILS
Complete Technical Specifications
| Razor MX350 Battery Kit Technical Data | |
|---|---|
| Battery Chemistry | High-Rate Discharge Sealed Lead Acid AGM |
| System Voltage | 24V (Two 12V batteries in series) |
| Capacity Per Battery | 7 Amp Hours (20-hour rate) |
| Dimensions Per Battery (L×W×H) | 5.94" × 2.56" × 3.84" (151mm × 65mm × 98mm) |
| Weight Per Battery | 6 lbs (2.7 kg) |
| Terminal Type | F2 (0.250" spade terminals) |
| Discharge Rating | High-Rate (HR Series) - Designed for electric vehicle applications |
| Compatible Models | Razor MX300, MX400, Pocket Mod, Sports Mod, Dirt Rocket series |
| Service Life | 18-24 months with proper maintenance |
| Warranty | One-Year Free Replacement |
| Kit Contents | Two 12V 7Ah batteries with F2 crimp connectors (reuse existing wiring harness) |
| Pre-Shipment Testing | Midtronics equipment verification, fully charged and voltage tested |
Critical Maintenance for Maximum Lifespan
Off-Season Charging Protocol: The leading cause of premature battery failure in recreational applications is sulfation during storage periods.
- Every 60-90 Days: Fully charge batteries using Razor-approved charger even when not in use
- Storage Temperature: Maintain below 85°F - higher temperatures accelerate self-discharge by 50% per 18°F increase
- Voltage Monitoring: Check resting voltage monthly during storage - readings below 12.4V per battery indicate immediate charging needed
- Post-Storage Procedure: After extended storage (3+ months), perform full charge cycle 24 hours before first use for optimal capacity recovery
Note: Sealed lead acid batteries naturally self-discharge at 3-5% monthly at room temperature. This is normal and does not indicate defect - quarterly charging prevents sulfation buildup that permanently reduces capacity.
Complete Compatibility Cross-Reference
| Razor Model | OEM Part Number | System Voltage | Compatibility Notes |
|---|---|---|---|
| MX350 Dirt Rocket | W13112430003 | 24V | Direct replacement, all model years |
| MX400 Dirt Rocket | W13112430185 | 24V | Direct replacement, all model years |
| Pocket Mod (all styles) | W13112430119 | 24V | Includes Bella, Sweet Pea, Euro models |
| Sports Mod | W13112430119 | 24V | Direct replacement, all colors |
| Ground Force Drifter | W13112430003 | 24V | Verify two-battery configuration model |
We've Seen What Happens When Batteries Fail
- Sulfation from Storage Neglect: Batteries left uncharged for 3+ months develop permanent capacity loss - reducing ride time by 40-60% even when "fully charged"
- Incorrect Polarity Installation: Reversed connections damage speed controllers within seconds - requiring $60-80 controller replacement plus labor and downtime
- General-Purpose Battery Substitution: Non-HR rated batteries cause voltage sag under load - reducing performance and creating 30% shorter lifespan from deep-discharge stress
We choose our batteries accordingly. Because recreational equipment should deliver consistent fun.
HOW TO INSTALL RAZOR BATTERIES
- 1. Pre-Installation Safety Check: Ensure scooter is powered off and disconnected from charger - verify power switch shows no indicator lights before beginning battery access
- 2. Document Existing Wiring: Photograph battery orientation and wire connections before removal - polarity reversal is the leading cause of controller damage requiring $60-80 replacement
- 3. Connection Sequence: Connect batteries in series maintaining correct polarity - positive terminal of battery 1 connects to negative terminal of battery 2 for proper 24V system voltage
- 4. Voltage Verification: Test system voltage at main connector before reassembly - should read 24-26V indicating proper series connection and full charge state
- 5. Initial Test Ride: Perform 5-minute controlled test at half-throttle before full-speed operation - allows battery management system to stabilize under initial load conditions


